


Final Cut Pro templates are a fantastic way of increasing your editing capabilities. There’s no need for hours spent creating bespoke assets — you can simply download and install them. Final Cut Pro X (FCPX) offers 4 plugins: Transitions, Effects, Titles, and Generators.
Installing FCPX assets is super easy and takes just a few minutes. Motion Array has compiled this guide to walk you through the steps so that you can get straight back to your editing.
Summary
Part 1: Work with Final Cut Pro templates
Final Cut Pro templates are straightforward to install if you know how to use Final Cut Pro — simply drag and drop them to the appropriate folder. Let’s look at the process in more detail.
The first step is downloading your chosen template and opening the zip folder. The download will contain several files, which we’ll get to in a moment.
Installing FCPX motion templates is much easier with 2 Finder windows as you can be sure you’re moving the assets to the correct location. To open a new Finder window:
- Select the Finder application and press Cmd+N.
- Place your Finder windows alongside each other after ensuring your download folder is showing.
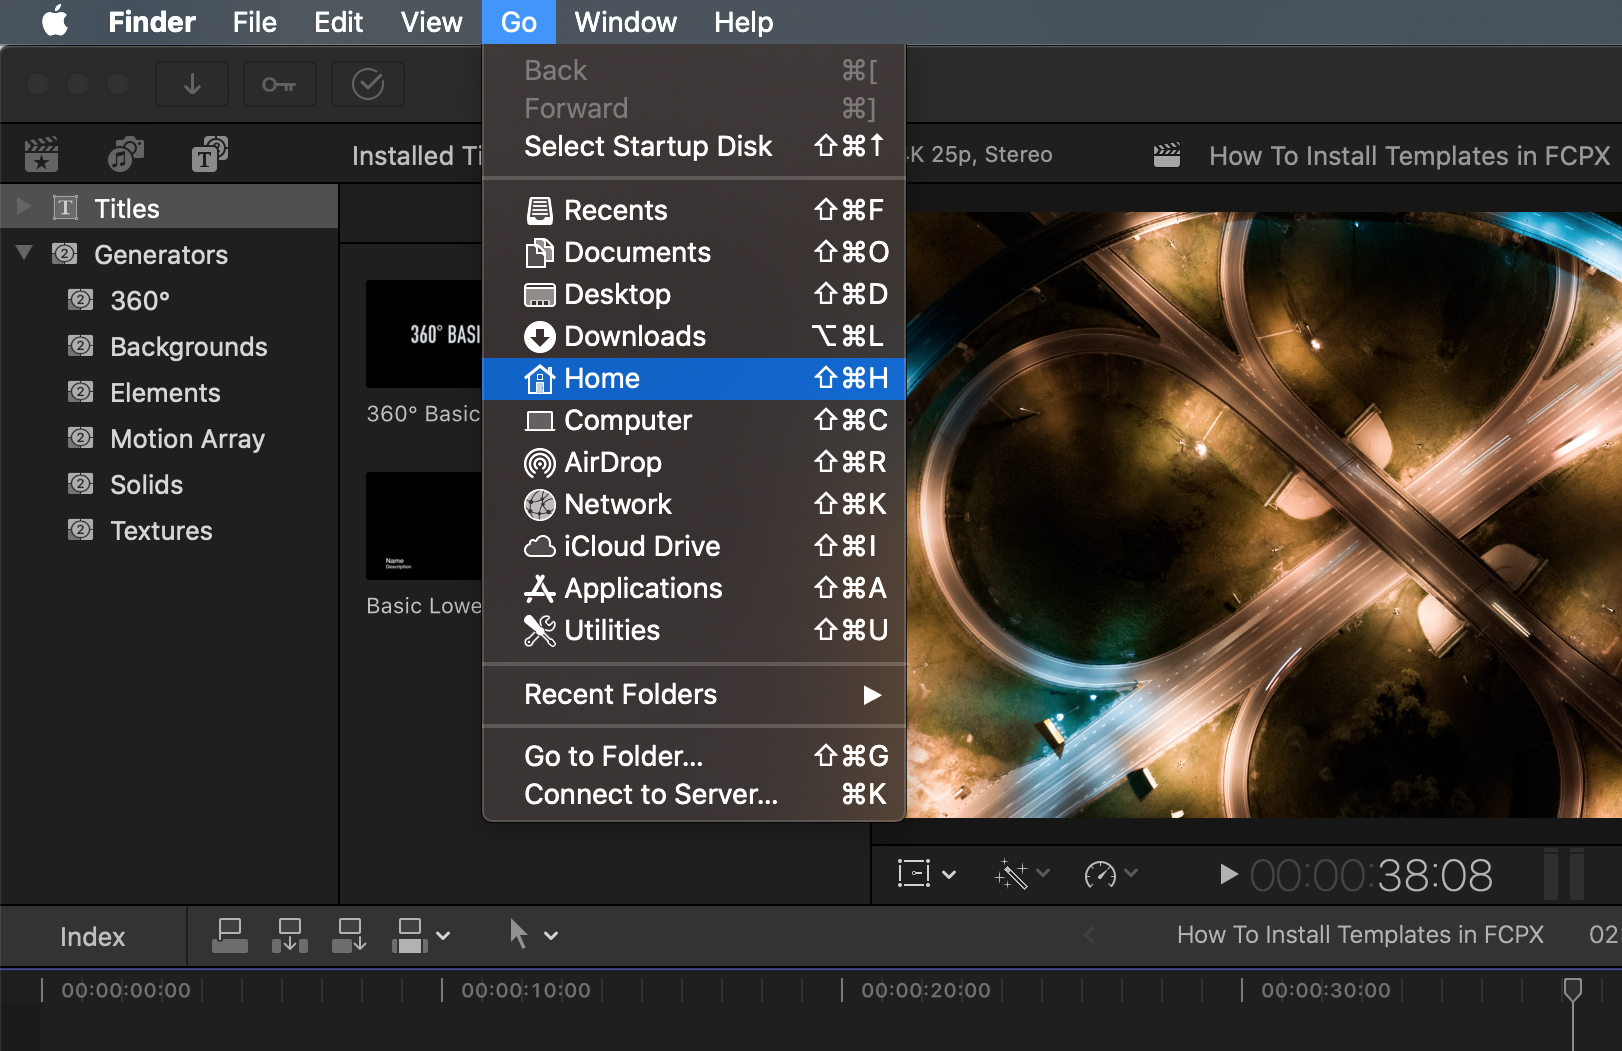
- Navigate to Go > Home > Movies.
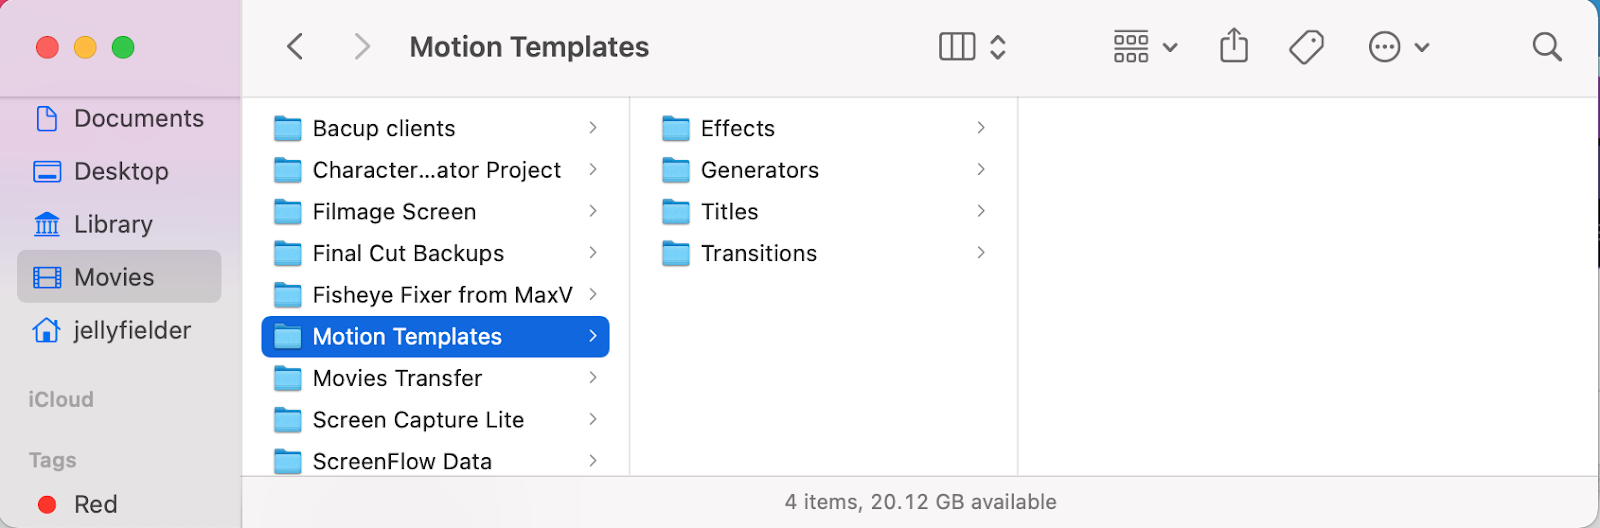
You’ll need to find the FCPX Motion Templates folder in the Movies folder. If you don’t see it, don’t worry — you can move straight to Part 2 to install the templates yourself. If the folder is there, open it to reveal 4 other folders: Effects, Generators, Titles, and Transitions. From here, you can move on to Part 3 of the tutorial.
Part 2: Create FCPX motion template folders manually
If you don’t have the Motion Templates folder, you’ll need to create it from scratch. Rest assured, there’s nothing wrong with your system, it’s just that you don’t have Apple Motion set up on your editing device.
- Select the Movies folder in Finder and hit Cmd+Shift+N to create a new folder.
- Name the new folder Motion Templates.localized. The ending is essential in the file structure as it will help Final Cut Pro know where to look for your templates. When you rename your folder, you’ll notice that the .localized part is hidden.
- Open the new Motion Templates folder and create 4 new folders inside.
- Rename each folder so you have Effects.localized, Generators.localized, Titles.localized, and Transitions.localized. Again, the .localized part will be hidden once you deselect the folder.
- Now you have the folder structure ready, you can begin importing your templates.
Part 3: How to place Final Cut Pro templates
The final stage of installing Final Cut Pro Templates is to put the template file in the correct location. As you already know, there are 4 places where you can store them. Luckily, FCPX knows exactly where to put what.
1. Find the template type
FCPX works with 4 file types indicated by 4 suffix endings: .moef, .motn, .moti and .motr. Sometimes the file will show the suffix, but other times, you’ll need to dig a little deeper.
- In the Downloaded Template folder, navigate to the template file.
- Find your template file and select it in the Finder.
- Press Cmd+I on your keyboard to open the Info window for the file. Check the file suffix to see where to drag the file.
2. Learn the template file suffix
Now you know what your template file is, you can quickly figure out which folder it needs. As with all things in Final Cut Pro, there’s a logic behind the suffix endings: Each folder will tell the program which panel to display your assets in.
- Files with .moef will go into the Effects folder.
- Files with .motn will go into the Generators folder.
- Files with .moti will go into the Titles folder.
- Files with .motr will go into the Transitions folder.
3. Organize your assets
Now that you know where to place your Final Cut Pro template, you can just drag and drop it from the Download location to the relevant folder. However, it’s best practice to organize your library a little more to help you manage it.
- Select the folder for your template file and hit Cmd+Shift+N to create a new folder.
- Name the folder something memorable to organize your Final Cut Pro panels — for example, ‘Motion Array.’
- Next, drag the template from the Downloads folder to your new Motion Array folder.
- When you download a pack of Final Cut Pro templates, you might find that they are already organized into folders. In this case, you can drag the entire folder to the relevant .localized folder.
- Finally, open Final Cut Pro and navigate to the relevant panel to find your new assets. Your templates will remain in your FCPX panel without reinstalling them each time.
Bonus: Tips for using Final Cut Pro templates
Installing FCPX motion templates is easy, but they can create some issues. Follow our top tips for a seamless workflow when using downloadable assets.
1. Organize your folders
As we’ve shown, you can create subfolders in your .localized spaces, which can be useful when you want to find something quickly. Plus, organizing your assets has several advantages that can improve your workflow and help troubleshoot Final Cut Pro issues.
You can use subfolders to organize your assets based on the following:
- Location: Knowing where you downloaded your assets lets you easily check their licensing.
- Genre: You can quickly find the type of effect you’re looking for based on the project.
- Branding: This lets you find specific assets based on a project’s brand, which is ideal for professional videographers and content creators with multiple clients.
2. Delete folders you don’t need
Each template asset won’t take up a lot of space, but as you build your library, you can quickly lose valuable storage space. If you enjoy using Final Cut Pro templates, you’ll likely have hundreds, if not thousands, of packs installed on your machine. Make sure you set yourself a limit on your library size and regularly clear out assets you don’t want or need.
3. Create a backup library
Accidents happen from time to time, and you might delete or remove a Final Cut Pro template by mistake. You might not even notice it’s gone until you return to a project and find the dreaded missing media warning. If you rely on your templates library, it’s a good idea to regularly back up the folder structure. Simply copy your FCPX motion templates folder to an external drive to back up your effects.
If you’d like to upgrade your tool kit, check out Motion Array. The extensive library of Final Cut Pro templates, add-ons, effects, and plugins includes everything you need to create top-notch videos.


